Training Guide Corporate Structure: Companies
Companies Overview
The Companies menu option of the Admin menu allows users to set up LMS and training Program parameters for a specific company such as:
§ Designating company representatives as key contacts for specific events, such as receiving automatic emails, etc.
§ Indicating if students from the company require permission to enroll in a specific Program, and/or to register for a specific course.
§ Specifying the administrative permission groups that can view and edit company information.
A company can be a business unit, a department, location, school, or an actual company. If other words, you define what a business entity is. Prosperity supports a hierarchical business unit structure. This way you can have a top level business unit, and build a full corporate tree underneath. You can assign permissions and curriculum rules for any business unit, and can have those permissions and rules ‘trickle down’ to the business units underneath it in the hierarchy.
If the student's company is not known or does not need to be set, Prosperity contains a default company called Individual. Companies, including Individual, each have their own set of curriculum rules for each training Program A program, or program of study, is a grouping of courses and/or activities. a program.
Getting Started with Companies
This guide shows you how to:
§ Set up Corporate Hierarchy
§ Set up Companies
§ Set up Company Reps
§ Set Company/Program access
§ Set up Company Admin Permissions
Set up Corporate Hierarchy
Add New Company
1. Select Companies from the Admin menu options.
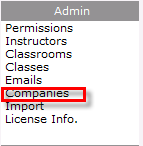
Figure 1: Companies Menu Option
2. Click Add New Company if the data form is not cleared.
NOTE: If you do not specify to “add new company” you will overwrite the company displaying on the screen.
3. Enter as much of the information in the company data form as necessary.
NOTE: Data fields for your site may be different than what is shown here. Work with your project consultant so that the desired data fields display.
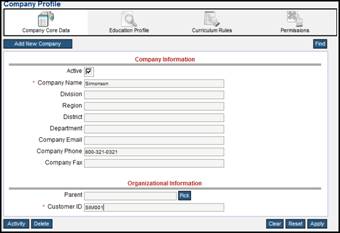
Figure 2: Company Core Data
4. Assign a Customer ID. This is used…
5. Click Apply.
Add to Corporate Hierarchy
Defining the corporate hierarchy simply means specifying a parent company, and then adding business units.
1. Click Companies from the Admin menu.
2. Click Add New Company to clear the form.
3. Make sure the Active checkbox is checked.
4. Complete the required fields in the Company Information form.
5. Click Pick to identify the parent compay.
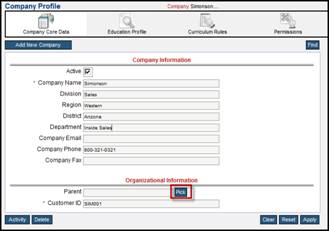
Figure 3: Pick Parent Company
6. Select the company that represents the parent company, or the top of the corporate hierarchy by clicking Pick.
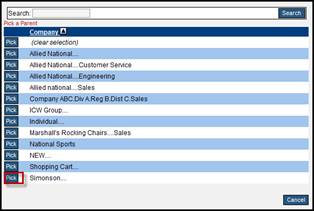
Specifying the parent company automatically grants all of the same curriculum rules and permissions to the department or business unit of the parent company.
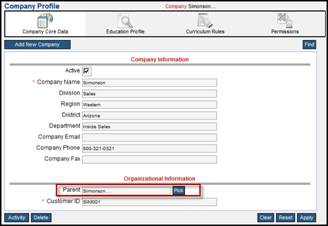
Figure 4: Set up Corporate Hierarchy
NOTE: Selecting from the Parent pick-list automatically assigns all of the parent company’s rules and permissions to the specified ‘company’.
7. Enter a customer ID. This alphanumeric string is used when students self-enroll by placing Programs into a cart.
8. Click Apply.
Set up a Company Rep
Next, you define Company Reps. A company rep is someone whose name and email address is displayed to students in a company. The Company Rep is also eligible to receive Event-driven Automatic Emails for students in their company. You only need to set up a company rep if want automated emails sent out to a company/division manager.
1. From the Company Core Data screen, click Education Profile from the horizontal menu bar.
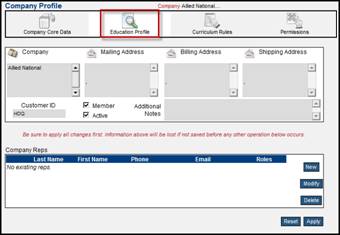
Figure 5: Education Profile
2. Existing company reps are listed here. To add a new company rep, click New to display the Contact screen.
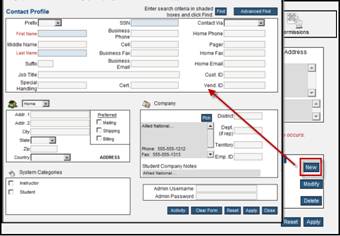
Figure 6: Contact Profile
3. From this screen you can search for an existing person by entering data into the shaded fields and clicking Find, or specify to create a new person to be added to the database as a company rep.
4. Fill out the desired demographic fields.
5. Use the Pick button to choose the appropriate company or business unit from a pick list.
6. Check the box for Company Rep at the bottom left of the screen.
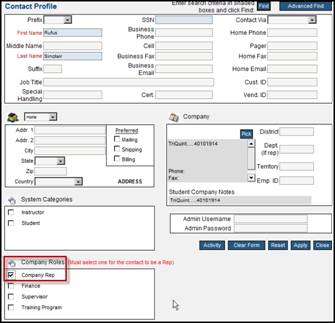
Figure 7: Company Rep
NOTE: If you want the company rep to have admin login permissions, fill in the Admin username and Admin password, and then assign that username to a permission group. (See the Add User to Permissions Group section in this training guide.)
7. Click Apply to save.
8. Click Close.
9. To view the rep in the company reps list, click Reset at the bottom of the screen.
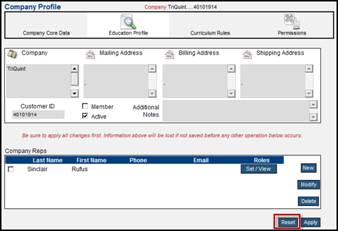
Figure 8: Company Profile with Company Rep
Company reps can be modified or deleted by clicking to check the checkbox next to their name and then clicking Modify or Delete.
Assigning Roles to a Company Rep
A company rep may have different roles in different business units. For example, they may be a supervisor in one business unit, and an approver in another business unit. Prosperity uses ‘Roles’ to specify what function a company rep has in a particular business unit. These roles are used when determining who to send an event driven email to.
1. Click Modify in the Company Rep portion of the Education Profile screen.
2. Scroll down in the Contact screen until you see the Company Roles options.
3. Click the appropriate roles for that rep in that company.
4. Click Apply.
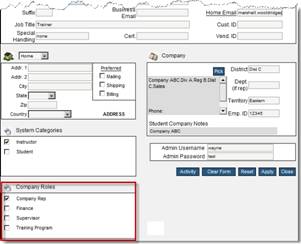
Figure 9: Assigning Company Roles
Curriculum Rules Overview
After you add a company to the database and specify a company rep (if needed), you must define the curriculum rules. This process specifies how students in a company should interact with the each Program. (See Curriculum: Programs Training Guide for instructions to set up programs in Prosperity.
NOTE: It is critical that you set up these curriculum rules. If rules are not saved for a company and a Program A program, or program of study, is a grouping of courses and/or activities. a program, students from that company will not be able to participate in that training Program
Getting Started with Curriculum Rules
This guide shows you how to:
§ Specify programs students from a specific company are allowed to enroll in.
§ Minimum passing exam scores and exam retake permission.
§ Specify if approval is required for students from a specific company to enroll in a program.
§ Specify if approval is required for students from a specific company to register in courses in a selected program.
Define Curriculum Rules
1. Select Company Status from the Reports menu options.
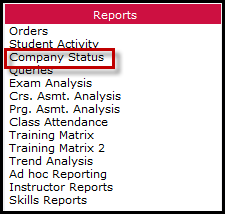
Figure 10: Company Status Menu Option
2. Select the company, or business unit.
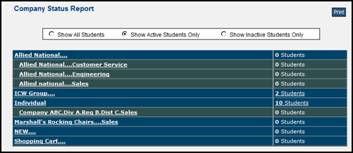
Figure 11: Company/Business Units
3. Click Curriculum Rules from the horizontal menu bar.
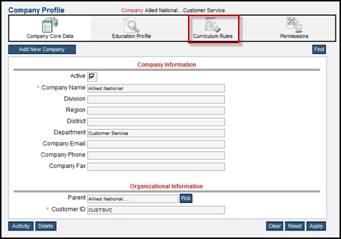
Figure 12: Curriculum Rules
You are now ready to specify rules for the selected company and/or business unit.
Inheritance
When you add a company to a permissions group, all of the business units lower in the hierarchy inherit the same permissions group. This is so an admin that has access to a business unit has access to all students in that business unit and those lower in the hierarchy.
Setting up curriculum rules is performed for every program your company and its business units are allowed to take. However, due to the inheritance feature business units inherit curriculum rules from the parent company so you do not have to set up curriculum rules for every business unit of a company.
4. From the Select a program dropdown, click to select a program.
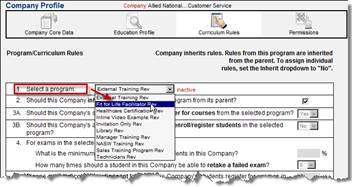
Figure 13: Select a Program
5. Specify program and course options for the specified program in step 1 as described below.
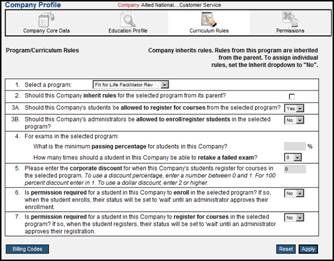
Figure 14: Program/Curriculum Rules
§ Rule #2: indicates whether, for the selected training Program the company Inherits these rules from its parent.
o If the company does not have a parent, this value cannot be set.
o If the selection is checked, the company has a parent, and the parent has rules set for the selected Program and all of the parent company rules for that selected Program will be applied.
o In turn, if the company has a parent, and the selection is checked this value can be unchecked and the remaining questions can be changed. If checked, click Apply for the rules to be set.
§ Rule #3A: allows you to specify whether students from the company should be allowed to register for courses in the selected Program.
o This effects which Programs a student has access to via Register for Courses from the student portal.
Note: Once a student is enrolled into a Program, the Program will then be available for registration.
§ Rule #3B: allows you to specify whether Administrators with permissions to the Company should be allowed to enroll/register students in the selected Program.
Note: Once a student is enrolled into a Program, the Program will then be available for registration.
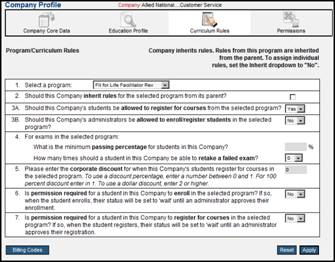
Figure 15: Curriculum/Program Rules (con't)
§ Rule #4: refers to setting up exam rules, including the minimum passing percentage for an exam taken in this training Program and the number of times a student should be able to retake a failed exam taken in this Program.
NOTE: If the passing grade is set on the exam that will take precedence over this setting.
§ Rule #5: is for used for e-commerce portals.
o If a student registers for the first time -- outside the LMS -- for a course in the selected Program and enters their corporate discount code when checking out, they will be given whatever discount is specified and they will be assigned to the company that matches that code.
o The corporate discount code is entered on the Company Core Data screen in the Company ID field. If a student registers for a course in the selected Program inside the LMS, having already been assigned a company, they will automatically receive the discount specified here for their company.
o Positive numbers less than 1 are considered to be percentage discounts, and numbers 1 or higher are considered to be dollar discounts.
o This field can be ignored for non-e-commerce LMS's or if no discount is desired.
§ Rule #6: allows you another option to control the student enrolling in the selected Program.
o If you choose to require permission on enrollments, when a student chooses to enroll in the selected Program, their enrollment status will be wait_for_approval, and they will not be able to register for courses in the Program.
o This is resolved in the Enroll Approvals section of the LMS, where you may approve or deny waiting enrollments.
§ Rule #7: allows you another option to control a student registering for a course in the selected Program.
o If you choose to require permission on registrations, when a student chooses to register for a course in the selected Program, their course status will be wait_for_approval, and they will not be able to participate in the course or take their exam.
o Administrators can approve/deny registrations via the Course Approvals link from the left hand menu on the Admin portal.
6. Click Apply.
NOTE: You MUST click Apply for the rules to be set. Otherwise, students from the company will not be able to participate in the selected training.
7. You must return to rule #1 and select another Program from the dropdown and set rules 2 – 7 for that selected Program.
NOTE: If no rules have been set for the selected program, students from the specified company will not be able to enroll.
Administrative Access Overview
During the process of setting up business units within Prosperity, you identify users who you want to have access to and a log in to the Prosperity Admin Portal. Setting up someone as an admin is performed by defining permissions. Think of permissions as providing an admin with keys to certain portions of Prosperity. With permissions, an admin can be granted or denied access to any of the main screen menu options. For example, a first line supervisor who logs into the Admin Portal, may only see one option – Reports, where as a content developer may only have access to the Courses and Program options under the Curriculum menu.
Getting Started with Setting up Administrative Access
This guide shows you how to:
§ Create a Permissions Group
§ Create Permissions
§ Create a user
§ Assign user to group
§ Assign company to group
Permissions Overview
Permissions are centered on what we call permission groups. A permission group can be thought of as an ‘administrative role’. Users are put into permission groups, which determine what they can do and see in the Admin Portal.
When you create permission groups you define:
§ What menu items administrators in this permission group have access to
§ What companies and students this permission group has access to
A group is a collection of users, where the users in a permission group have access to information about companies in the same permission group. Here is the structure:
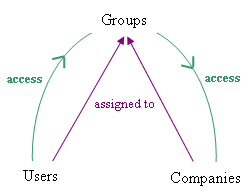
Figure 16: Permissions Overview
Figure 1 illustrates how users and companies are assigned to permission groups. By assigning a user to a permission group, they gain access to companies. Users and companies are assigned to groups. When a user logs in, the LMS sees what group(s) the user belongs to and allows him/her to access information only for the companies that are assigned to his/her group(s).
Create Permission Group
1. Accessed from the Admin menu options, select Permissions to begin.
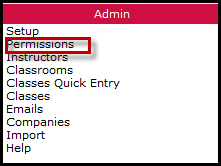
Figure 17: Permissions Menu Option
2. The User/Group Administration screen displays and lists administrative groups. EnterpriseAdmin is a default group with global permissions. From the User/Group Administration screen you can view, edit, and create groups and users.
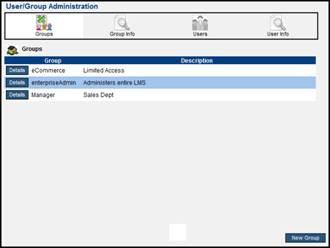
Figure 18: User/Group Administration
WARNING: Do not edit the permissions for the enterpriseAdmin group.
3. Click the Details button to view or edit information about the group.
4. To add a new group, click the New Group button.
5. Enter the group name in the Group field.
WARNING: Group names may not be modified and can contain only alphanumeric characters and the underscore. Do not insert spaces, for example: Main Group.
6. Enter a description in the Description field.
7. You may also specify a Welcome page message to be displayed to users in this group when they log in.
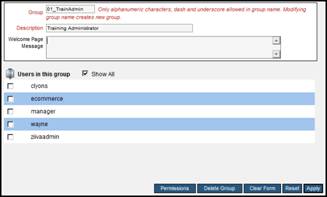
Figure 19: Add a Group
8. Click Apply.
Create Permissions
1. Click Permissions.
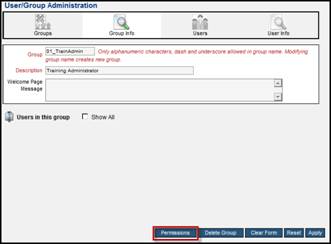
Figure 20: Add Permissions
2. Click to check the tasks and areas of the Admin Portal that users in this permission group should have access to, then click Apply.
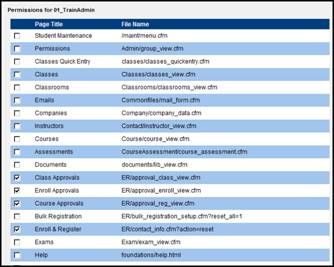
Figure 21: Specify Permissions
Create and Add User
1. Create a user by clicking Users from the horizontal menu bar.

Figure 22: Users
2. Existing users display. Click New User.
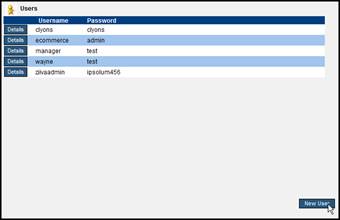
Figure 23: Add New User
3. Enter the user name and password.
4. Click to specify the group the user is assigned to.
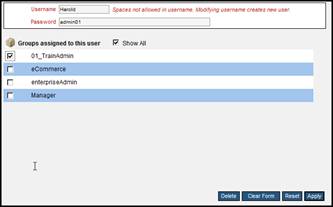
Figure 24: Add User to Group
5. Click Apply.
NOTE: You can modify an administrative user’s password using this screen. You can remove the user from groups using the checkboxes in the Groups grid. Usernames may not be modified.
Add Companies to Permission Group
You can assign one or more companies to a group during the company setup process. By assigning a permission group to a company, you grant access to all users in that group to see students in that company and all companies beneath it in the hierarchy.
1. Select Companies from the Admin menu options.
2. Search for the company by entering the company name and clicking Find.
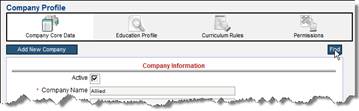
Figure 25: Search for Company
3. Click Select next to the appropriate company.
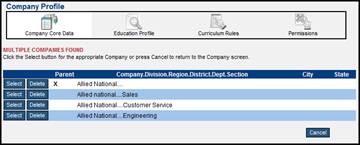
Figure 26: Select Company
4. From the Companies screen, click Permissions from the horizontal menu bar.
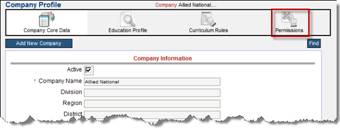
Figure 27: Permissions
5. The enterpriseAdmin group displays by default. To see groups, click Add Group.
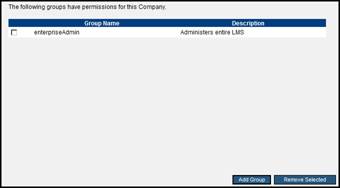
Figure 28: Add Group
6. From the Groups pick list, click Select next to the appropriate group.
7. The Groups pick list window closes and the group is automatically added to the Permissions screen.
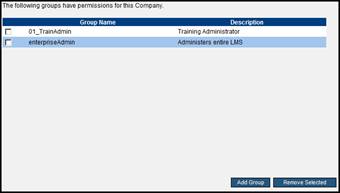
Figure 29: Groups
8. To remove a Group use the checkbox next to the Group name and click Remove Selected.
 Companies
Overview
Companies
Overview