Training Guide Training Resources: Emails
Setting Up Email Notifications
The email setup function is located in the Admin Portal, as a menu option under Admin.
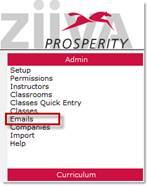
Figure 1: Email Menu Option
Prosperity allows you to specify emails to be automatically generated based on a specific event occurring within a program. Each program’s emails are configured independently of the other program. Examples of events are:
§ Registering a student for a course
§ Completing an course
§ Enrolment approved or declined
§ Registration approved or declined
§ Class cancellation
Emails can also be generated to send a reminder. Here are examples of reminders that trigger emails:
§ Reminding students that their certification requires renewal
§ Reminding students of their upcoming course
§ Reminding students to complete their course within [ adjustable value ] days
A bank of prebuilt email templates exist which you can is as is or modify to meet your organization’s needs. You can also create new email templates. Prosperity fills in the required ‘details’ of the email, depending on what event that email is associated with during program set up. For example, if a particular email is associated with a ‘course registration’ event, then the course name will be automatically added to the email. If an email is associated with a class schedule change, then Prosperity will automatically include the class name and schedule details in the email.
This guide focuses on setting up email templates.
Getting Started with Emails
The email functionality is accessed by clicking Emails option under the Admin menu.
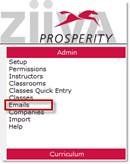
Figure 2: Select Emails/View Email Bank
The email bank is a list of all the email templates in the system. From here you can create and modify the email templates.
1. From the Email main screen, click Open Existing Email.

Figure 3: Open Existing Email
2. A separate window opens containing a scrollable list of existing emails.
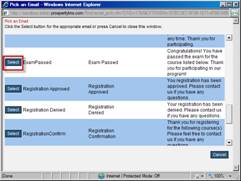
Figure 4: Bank of Existing Emails
3. Clicking the Select button opens the specified email inside the Email main screen.
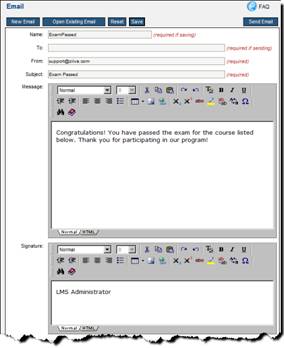
Figure 5: View Email
Modify Existing Email
From the main Email screen you can:
§ Modify any field or body of the selected email.
§ Specify to remove or add an attachment
§ Manually send the email *
* NOTE: If the email is sent from this screen, it will not contain any student or course specific information. No data fields {implicit and explicit} are filled in when manually sent from the email screen.
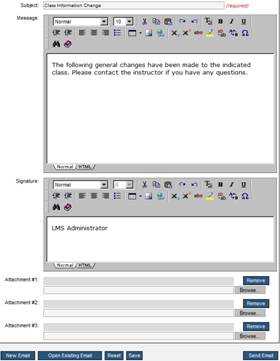
Figure 6: Modify Existing Email
Modify Email
You can take an existing email and modify it by:
§ Changing the name in order to create a new email template based on an existing one
§ Changing the subject line
§ Changing the message contents; both fixed text and dynamic data fields
§ Changing the format and layout
§ Add or remove attachments
1. To change the message of the email, click inside the message text field and type changes by adding or deleting text.
NOTE: The email editor supports HTML features such as inserting hyperlinks.
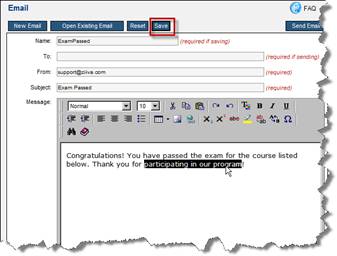
Figure 7: Save Modified Email
2. After your changes are completed, click Save. (Or, click Reset to return to the original email.
Add/Remove Attachment(s)
The email function allows you to specify attachments for emails. For example, you might want to send a map with directions to the training site with the registration confirmation email.
1. To add an attachment, click the Browse button.
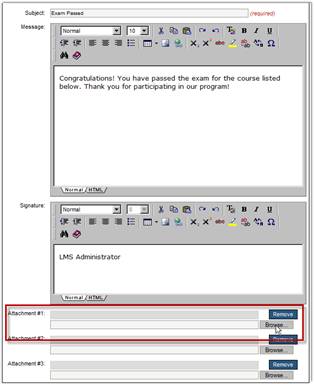
Figure 8: Add Attachment
2. Navigate to where the document resides on your computer or a server, and double-click.
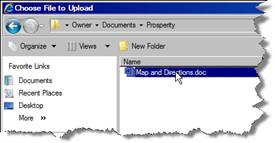
Figure 9: Navigate and Select Attachment
3. The file displays in the Attachment field.
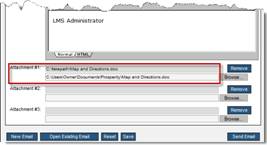
Figure 10: Added Attachment
4. To remove an attachment, click Remove.
5. Click Save to save your changes.
Create a New Email
1. From the Email screen, click New Email.
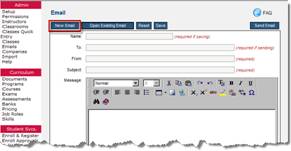
Figure 11: New Email
2. Complete the following fields:
o Name: this refers to the name of the email. If you are creating a new email you will be associating to an event, a name is required.
o To: generally this is left blank and is populated by the system based on the generating event. This is only used if you are authoring an email to send from this page.
o From: this can be a default email address, but is required.
o Subject: this field is required.
o Message: Enter the content of the email, using any of the formatting tools displayed in the button bars.
o Signature: Enter the signature using any of the formatting tools displayed in the button bars.
o Attachment: You can attach up to three documents by clicking Browse and navigating to the document on your computer.
3. Click Save.
Add Placeholders (Data Fields)
What if you want to personalize emails, so that the greeting includes the student’s first name? This is one example of why you would use data fields or placeholders when creating or modifying emails in Prosperity. Placeholders refer to data fields inserted into the body of an email, which the system understands to substitute with actual data when the email gets sent.
NOTE: If you’re using placeholders (data fields) then Prosperity will use those data fields and only those data fields in the email. If you’re not using data fields, Prosperity puts in whatever it thinks is appropriate based on the event or reminder it is associated with. For example, if the event is a course registration, then Prosperity will put in name of course.
1. Open an existing email or follow the steps to create a new email.
2. Place the cursor where you want to insert a data field, or select text you want to replace with a data field.
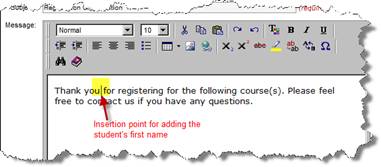
Figure 12: Insert Data Field
3. Click the FAQ button in the main email screen and scroll down until you see the list of variables you can use in emails.

Figure 13: FAQs for Inserting Data Fields
4. Use your mouse to select and copy the placeholder next to the appropriate value from the FAQ Help screen.
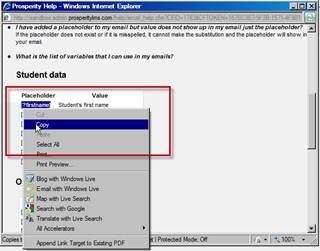
Figure 14: Copy Placeholder
5. Paste the placeholder into the appropriate spot in the email.
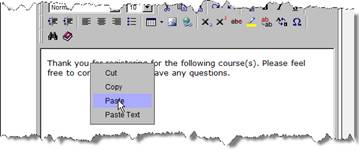
Figure 15: Paste Placeholder into Email
6. The placeholder displays in your email.
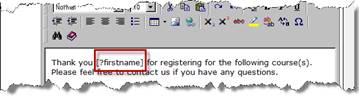
Figure 16: Inserted Data Field
7. When this email is triggered by the associated event, the placeholder is replaced with the student’s first name.
Using Your Emails
Associating emails to events and reminders is covered in the Curriculum: Programs training guide.
 Setting Up Email
Notifications
Setting Up Email
Notifications