Training Guide Training Resources: Certificates
Certificates Overview
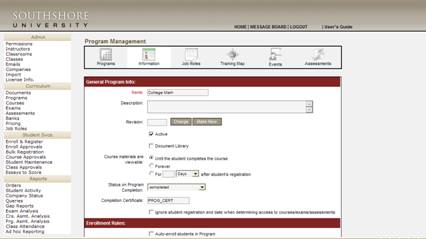
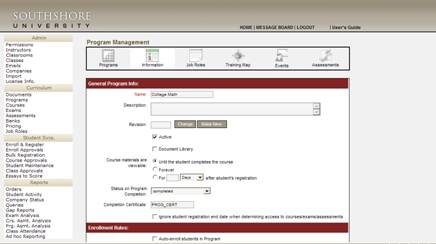
Certificates of completion can be generated at the course or program level. Typically, the corporate user provides their project consultant with a PDF file containing the certificate template. The file name is entered into Certificate Name field in the Course Information screen, and again in the Certificate field in the Course Tracking screen. For program completion certificates, the file name is entered in the Completion Certificate field in the Program: General Information screen. The required configuration work is performed by the project consultant.
Getting Started with Certificates
This guide shows you how to:
Configure a certificate of completion for a course.
Configure a certificate of completion for a program.
Creating Course Level Certificates
After the file name is entered into the appropriate fields in Prosperity, there are five steps for the configuration.
1. Create the template pdf file
2. Create form fields within the Pdf file
3. Secure Pdf file
4. Create corresponding XML file
5. Place Pdf and XML file within the /Config directory on the server into both the admin and student portals. Associate the certificate by typing the pdf file name (without the file extension) into the certificate name field on the applicable course information page.
The required application is Adobe PDF Writer.
§ Ensure that the following code is within the constants.cfm file in both the student and admin directories.
<CFSET allow_stu_certificates = 1 >
§ Ensure that a view is created in the database that captures the applicable enrollment information
StuRegV (previously created and added)
Step 1: Create the Template PDF File
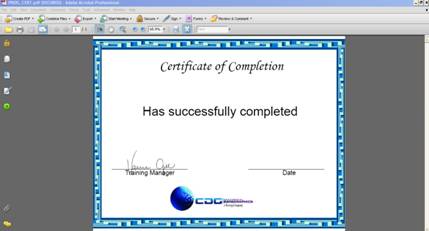
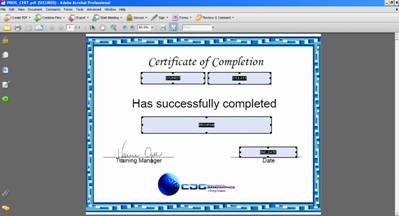
Create a template PDF certificate file within Adobe with the applicable space left available for the student specific information (ie Student’s name, Program/Course name, completion date). This data will be generated by the system through dynamic form fields within the Pdf file.

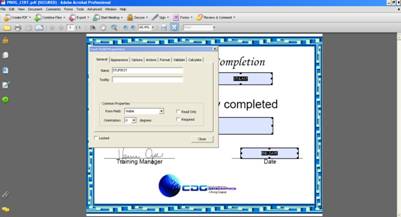
1. Insert the applicable form fields on the Pdf via the top menu item ‘Tools’ à ‘Forms’ à ‘Text Field Tool’.
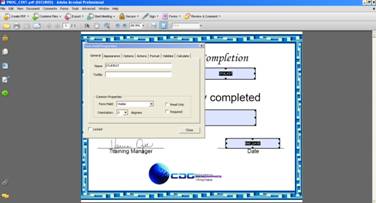
2. Click and drag to create the desired size rectangle that will insert the applicable information. A ‘Text Field Properties’ box will appear.
3. Insert the information into the ‘Name’ field (ie FIRST_NAME LAST_NAME) in ALL capital letters. You can adjust the font style, size, and color through the ‘Appearance’ and ‘Options’ tabs within the Text field Properties window.
4. Click the ‘Close’ button when done.
5. Create the remaining fields and center appropriately on the certificate.

Step 3: Secure the Certificate
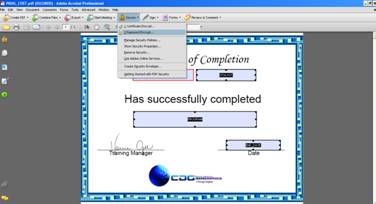
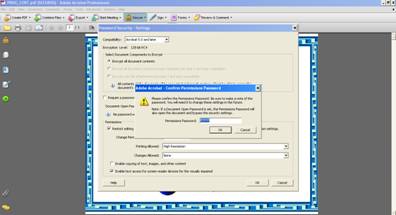
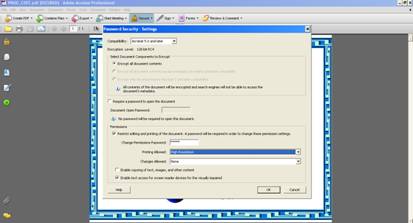
1. Secure the certificate file by clicking on the top menu icon ‘Secure’à ‘Password Encrypt’
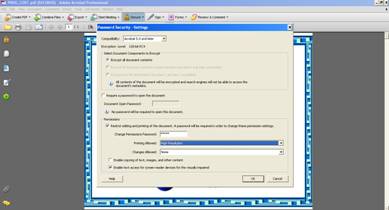
2. A ‘Password Security- Settings’ dialog box will appear. To properly secure the file and allow printing, select the check box next to the text that reads, ‘Restrict editing and printing of the document.
3. A password will be required in order to change the permissions settings.’ Enter a password and select ‘High Resolution’ from the Printing Allowed drop down selections.
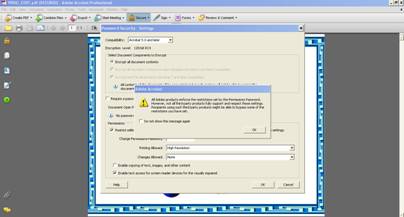
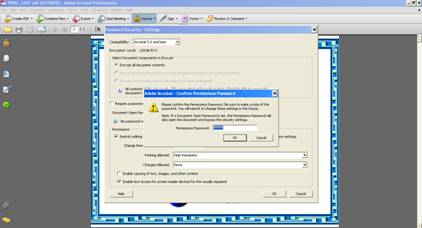
4. Another dialog box will appear, click ‘Ok’ to continue.
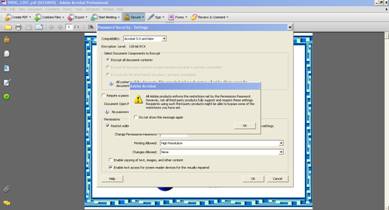
5. Enter in the password again and click ‘Ok’. The dialog boxes should then disappear, Save the file. Internal password is ‘ziiva’.
HINT: To disable the security settings, close the file and reopen. Click the top menu icon ‘Secure’à ‘Password Encrypt’ à enter password (Ziiva)à click ‘OK’ à click the ‘Cancel’ button.
Step 4: Create XML File
Create an xml file with the SAME name as the pdf file excluding the file extension (ie certificate.pdf and certificate.xml). The xml file must contain the applicable field ‘name’ tags. These names are consistent with the fields created within the Pdf file. See below for sample xml contents.
<?xml version="1.0" encoding="UTF-8" ?>
<form name="certificate">
<formSection dtable="STUREGV" key="key_ENROLLMENT">
<field name="Student data" dtype="heading" />
<field name="stu_first" dtype="textbox" id="stu_first" dcolumn="stu_first" fieldtype="string" defaultvalue=""
readonly="yes" />
<field name="stu_last" dtype="textbox" id="stu_last" dcolumn="stu_last" fieldtype="string" defaultvalue=""
readonly="yes" />
<field name="course_name" dtype="textbox" id="course_name" dcolumn="course_name" fieldtype="string" defaultvalue="" readonly="yes" />
<field name="end_date" dtype="date" id="end_date" dcolumn="end_date" fieldtype="date" defaultvalue="" format="mm/dd/yyyy" readonly="yes" />
</formSection>
</form>
§ STUREGV = view in the database
§ Stu_first / stu_last = Alias in the view for student first name and last name combined. This is also the ‘Name’ of the form field within the pdf file.
§ Course_name = Alias in the view for course name. This is also the ‘Name’ of the form field within the pdf file.
§ end_date = Alias in the view for the course completion date. This is also the ‘Name’ of the form field within the pdf file.
Step 5: Place the PDF file
Place the corresponding pdf and xml files into the Config directories within both the Admin and Student portals. To link the certificate to a specific Course, locate the course from within the Administrative portal and insert the name of the pdf (and xml) file, excluding the file extension, into the Certificate field on the Course information page.
Creating Program Level Certificates
After the file name is entered into the appropriate fields in Prosperity, there are five steps for the configuration.
1. Create the template pdf file
2. Create form fields within the Pdf file
3. Secure Pdf file
4. Create corresponding XML file
5. Place Pdf and XML file within the /Config directory on the server into both the admin and student portals. Associate the certificate by typing the pdf file name (without the file extension) into the certificate name field on the applicable course information page.
The required application is Adobe PDF Writer.
Configuration Requirements:
§ Ensure that the following code is within the constants.cfm file in both the student and admin directories.
<CFSET use_prog_certificate=1>
<CFSET prog_certificate_file = "report/cert_prog.cfm">
<CFSET allow_stu_certificates = 1 >
(previously added)
§ Ensure that a view is created in the database that captures the applicable enrollment information
rptProgCompletionsV (previously created and added)
Step 1: Create the PDF File
Create a template PDF certificate file within Adobe with the applicable space left available for the student specific information (ie Student’s name, Program name, completion date). This data will be generated by the system through dynamic form fields within the Pdf file.
1. Insert the applicable form fields on the Pdf via the top menu item ‘Tools’ à ‘Forms’ à ‘Text Field Tool’.
2. Click and drag to create the desired size rectangle that will insert the applicable information.
3. A ‘Text Field Properties’ box will appear. Insert the information into the ‘Name’ field (ie STU_NAME) in ALL capital letters. You can adjust the font style, size, and color through the ‘Appearance’ and ‘Options’ tabs within the Text field Properties window.
4. Click the ‘Close’ button when done.
5. Create the remaining fields and center appropriately on the certificate.
Step 3: Secure the Certificate
1. Secure the certificate file by clicking on the top menu icon ‘Secure’à ‘Password Encrypt’

2. A ‘Password Security- Settings’ dialog box will appear. To properly secure the file and allow printing, select the check box next to the text that reads, ‘Restrict editing and printing of the document.
3. A password will be required in order to change the permissions settings.’ Enter a password and select ‘High Resolution’ from the Printing Allowed drop down selections.
4. Another dialog box will appear, click ‘Ok’ to continue.
5. Enter in the password again and click ‘Ok’.
6. The dialog boxes should then disappear, Save the file. Internal password is ‘ziiva’.
HINT: To disable the security settings, close the file and reopen. Click the top menu icon ‘Secure’à ‘Password Encrypt’ à enter password (Ziiva)à click ‘OK’ à click the ‘Cancel’ button.
Step 4: Create XML File
Create an xml file with the SAME name as the pdf file excluding the file extension (ie certificate.pdf and certificate.xml). The xml file must contain the applicable field ‘name’ tags. These names are consistent with the fields created within the Pdf file. See below for sample xml contents.
<?xml version="1.0" encoding="UTF-8" ?>
<form name="certificate">
<formSection dtable="rptProgCompletionsV" key="key_ENROLLMENT">
<field name="Student data" dtype="heading" />
<field name="stufirst" dtype="textbox" id="stufirst" dcolumn="stufirst" fieldtype="string" defaultvalue="" readonly="yes" />
<field name="stulast" dtype="textbox" id="stulast" dcolumn="stulast" fieldtype="string" defaultvalue="" readonly="yes" />
<field name="program" dtype="textbox" id="program" dcolumn="program" fieldtype="string" defaultvalue="" readonly="yes" />
<field name="end_date" dtype="date" id="end_date" dcolumn="end_date" fieldtype="string" defaultvalue="" format="mm/dd/yyyy" readonly="yes" />
</formSection>
</form>
§ rptProgCompletionsV = view in the database
§ Stufirst = Alias in the view for student's first name. This is also the ‘Name’ of the form field within the pdf file.
§ Stulast = Alias in the view for student's last name. This is also the ‘Name’ of the form field within the pdf file.
§ Program = Alias in the view for program name. This is also the ‘Name’ of the form field within the pdf file.
§ end_date = Alias in the view for the program completion date. This is also the ‘Name’ of the form field within the pdf file.
Step 5: Place the File
Place the corresponding pdf and xml files into the Config directories within both the Admin and Student portals. To link the certificate to a specific Program, locate the Program from within the Administrative portal and insert the name of the pdf (and xml) file, excluding the file extension, into the Certificate field on the Program information page.
 Training Guide Setting Up
Instructor Led Training (Class Sessions)
Training Guide Setting Up
Instructor Led Training (Class Sessions)