Training Guide: Set Up Training Resources: Create Course Content
Course Content Overview.. PAGEREF _Toc261432215 \h 3
Getting Started with Adding Course Content 3
Add Pre-built Course Content 4
Setting up a Course that is Word, Excel, PowerPoint, etc…... 6
Using the Prosperity Content Builder. 8
Upload a Resource to the Server 14
Course Content Overview
Course content refers to the learning presentations which learners must complete as one of the requirements for completing a course. There are three methods to add course content to Prosperity:
§ Upload a pre-built SCORM compliant course, created outside of Prosperity
§ Use the Prosperity Content Builder
§ Upload a Word document
Getting Started with Adding Course Content
This guide shows you how to:
1. Upload Prebuilt SCORM Compliant Courses
2. Upload a Word or PowerPoint Course
3. Create a Course using the Prosperity Content Builder
The courses functionality is accessed by clicking the Courses option of the Curriculum menu. (See the Add Courses to the Course Catalog Guide for instructions on adding a new course.)
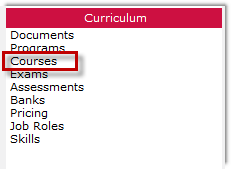
Figure 1: Courses Menu Option
1. From the Courses main screen, click Upload in the Online Course Content box.
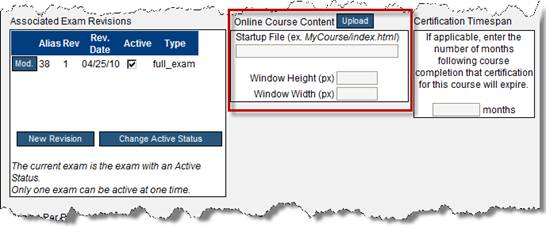
Figure 2: Add New Course Content
2. Click Browse and locate the zip file you wish to upload.
3. Click Upload to transfer the Zip File containing your Online Course Content to the Prosperity server.
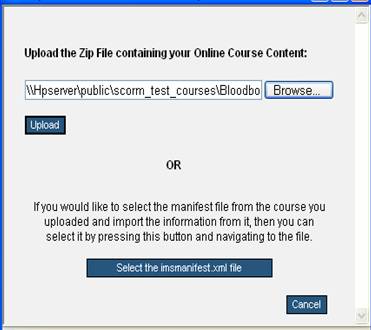
Figure 3: Upload Zip File
4. Navigate and choose the upload directory, or create a new directory and then select it. To create a new directory, type in the directory name and click the Create button.
WARNING: Never upload files into the root directory. You should create a new directory for each new course uploaded to the server.

Figure 4: Upload to Directory
5. Select Upload here.
6. A warning will pop up asking ‘Files in this directory may be overwritten. Are you sure you want to continue?’
7. Click Continue to proceed. Files will only be overwritten if a file exists in the selected directory with the same name as the uploaded file.
8. Click Apply
CAUTION: The Course, Description, and ID could be overwritten by the information pulled from the manifest file. Always check to make sure the course name and description are as expected on the course information page once data have been applied.
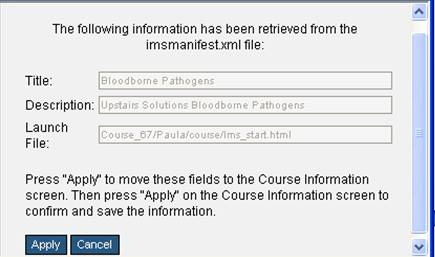
Figure 5: Course Title Confirmation
9. Click Apply on the course information page to save changes to the selected course.
Setting up a Course that is Word, Excel, PowerPoint, etc…
1. From the Course screen, click the Upload button located in the middle of the course information page.
2. Browse and Upload the File containing your Online Course Content
3. Navigate and choose the upload directory, or create a new directory and then select it. To create a new directory, type in the directory name and click the Create button.
WARNING: Never upload files into the root directory. You should create a new directory for each new course uploaded to the server.
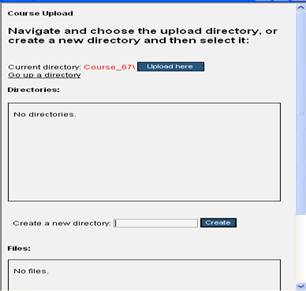
Figure 6: Upload to Directory
4. Select Upload here.
5. A warning will pop up asking ‘Files in this directory may be overwritten. Are you sure you want to continue?’
6. Click Continue to proceed. Files will only be overwritten if a file exists in the selected directory with the same name as the uploaded file.
7. Click Apply
CAUTION: The Course, Description, and ID could be overwritten by the information pulled from the manifest file. Always check to make sure the course name and description are as expected on the course information page once data have been applied.
8. The system will recognize that there is no imsmanifest.xml file. This is a file only found within SCORM compliant courses.
9. Click Continue to allow the start up location to be populated (located directly under the upload button on the course information page.)
10. Click Apply on the course information page to save changes.
Using the Prosperity Content Builder
A course developed with the Prosperity Content Builder has two major components:
§ Course Pages represent the framework or skeleton of the course. The course pages define the general layout of the course, the sidebar, and the header. The basic elements of course content are represented in the following diagram. As well, the welcome and finish pages are part of the general course pages.
§ Objective Pages represent the main content of a course as well as the footer section. Each objective will have one or more content pages that appear in the Content Area as specified in the diagram below.
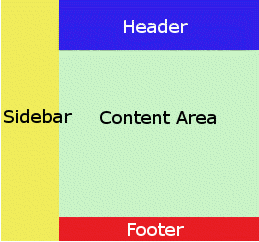
Figure 7: General Screen Layout
•
Style sheet - The style sheet page defines the general appearance
of the course including the appearance of the sidebar menu. If you have
experience with HTML, you can modify the current styles or create new styles to
use within your course. If you make changes to this file, don't forget to
press the Apply button to record the changes.
•
Index - This page defines the basic layout of the course.
The size of the sidebar menu, the header, and the main content area are
defined in this file.
|
|
Unless you are an experienced HTML coder, we recommend that you do not alter the Index page. Modifications to this page may very likely prevent your content from loading properly. If you do need to increase or decrease the amount of space for your sidebar menu, you will want to modify the first FRAMESET which specifies the column width. Only alter the numeric values, do not remove the quotation marks or the page may cease to function properly. <FRAMESET cols="125,*" . . . > If you do need to increase or decrease the amount of space for your header, you will want to modify the second FRAMESET which specifies the row heights. Only alter the numeric values, do not remove the quotation marks or the page may cease to function properly. <FRAMESET rows="100,*" . . . > |
§
Header - The header file is an HTML file that specifies the
appearance of the top portion of every page of the course. Although it can
be any size, it is generally kept small enough to contain a corporate logo and a
course title. Remember, this is a course specific file and remains static
throughout the entire course; however, it is a standard HTML page and can
contain HTML tags, images, Macromedia Flash, and more. If you select to
edit this file, the HTML WYSIWYG content editor will load in the right-hand
portion of the screen.
§
Welcome - The welcome page is the first page that loads in the
content section when the student accesses the course. This is a standard
HTML page and can contain any HTML content that you desire. When you
select to edit this page, the HTML WYSIWYG editor will load in the right-hand
portion of the screen.
§
Finish - The finish page will be the last page of content for the
course. Like the welcome page, this is a standard HTML page. When
you select to edit this page, the HTML WYSIWYG editor will load in the
right-hand portion of the screen.
§
Sidebar - The sidebar is auto-generated and not directly editable.
However, several items that determine the appearance of the sidebar are
editable. These items are listed in the SideBar Menu Appearance section of
the left-hand portion of the Course Content Editor Page.
§ Exam / Pretest - If you are employing a pretest and/or final exam with the delivery type set to "All Objectives/Chapters at Once," you have the option to include an additional page which includes a button link to the pretest and an additional page with a button link to the final exam. Links will appear beneath the Content / Resource buttons that allows you to Insert Page Link to Pretest and Insert Page Link to Exam. Both of these links will add a page at the end of the course (after the Finish Page) which has a button that links to the pretest or final exam respectively. This is an editable page just like the Welcome Page and the Finish Page.
Now that you have entered the basic information for your course, you will proceed to the Objectives & Content page from the horizontal menu bar. Prior to creating any content it is important that you determine what the objectives Each objective will correspond to a goal, knowledge object, or chapter for the particular course / exam. A course or exam consists of one or more objectives. of your course will be. Every course must consist of at least one topic, but courses of even moderate complexity will typically consist of multiple objectives.
From the objectives and content page you will be able to add, modify, arrange, and remove objectives from your course. The first row of buttons at the bottom of the page consists of the objective buttons.

Figure 8: Objectives Buttons
1. Select the Add Objective button. This will open the objective blank window.
NOTE: Objectives are reusable content and you can either select a current objective that exists within a course or create a new objective by selecting the New Objective button. If you are creating a new objective and you press the New Objective button, the screen will change to the Add/Modify Objective screen.
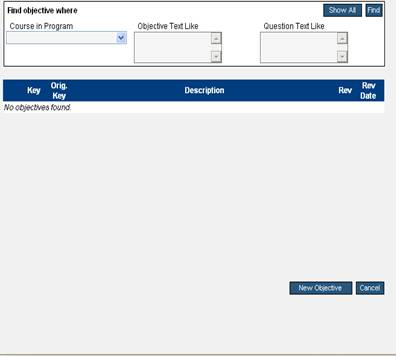
Figure 9: Add/Modify Objectives
2. Enter a word or short phrase in the Text Field.
3. Select APPLY to create your objective and add it to the course.
After completing the objectives, you may then add course content to them. From the objective list, choose the Edit button in the “Online Content column to the right of the particular objective you wish to edit.
1. Go to the Objectives and Content Page for that particular course you wish to modify.
2. From the objective list, choose the edit button in the “Online Content” column to the right of the particular objective you wish to edit.
3. Select the Edit button.
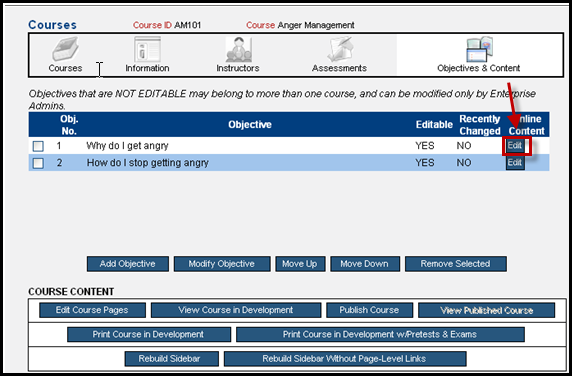
Figure 10: Add Online Content
4. This opens the Objective Content Editor Window.
5. Click the “Insert Content Page at End of List” link.
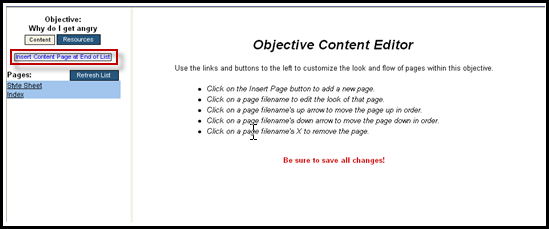
Figure 11: Objective Content Editor
6. You are prompted for the file name. Enter the filename and specify the file extension as either .html or .htm. If not specified, the default file extension is .htm.
7. Click OK.
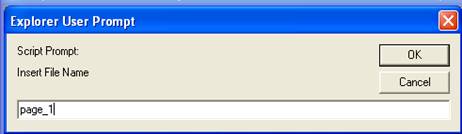
Figure 12: Enter File Name
8. The screen updates and the page is added to the page list on the left-hand side.
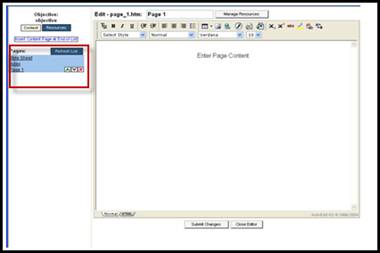
Figure 13: Online Content
There are two basic types of resources:
§ Files to be uploaded to the server and utilized within the course. These will include images, Macromedia Flash files, Adobe pdf files, Microsoft Word documents, Windows Media Video files, MP3 sound files, etc.
§ HTML Files that do not comprise part of the main portion of the course content, but that you wish to create and link to from within your course content.
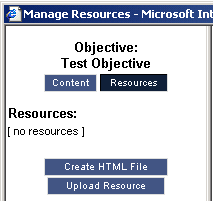
Figure 14: Resources
When you switch to the Resources List, the left-hand portion of the screen displays:
§ The list of resources attached to this objective.
§ A button for creating an HTML resource page.
§ A button for uploading a resource to the objective resource folder.
The right-hand portion of the window varies based upon whether you have selected an HTML page or another resource.
§ If you have selected a non-HTML page resource, the right-hand display will show nothing.
§ If you have selected an HTML resource page, the right-hand displays the following:
o The top of the page will display the name of the particular file you are editing.
o The majority on the page will display the WYSIWYG content editor.
o Beneath the WYSIWYG content editor there are two buttons: Submit changes and Close Editor.
Upload a Resource to the Server
1. Click Create HTML File.
2. You are prompted for the name of the file that you wish to create.
3. Click OK.
4. A HTML file is created and the file can be edited by selecting the linked file name.
While you are creating your course content and designing course appearance, you may want to view the course as it would appear to the students.
1. Click View Course in Development.

Figure 15: View Course in Development
2. A window displays the course as it appears to a student who selected to view the course.
3. You can browse through the course material using all of the same links and buttons that are presented to a student.
4. When finished, exit the course preview by pressing the window close "X" in the upper right-hand corner or click Exit.
When you are satisfied with the content and appearance of your course, you publish it which packages the files in a manner suitable for students to view.
1. Click Publish Course. According to the size of the course this may take several seconds to complete.
2. Once publishing has successfully completed, a "Publish Successful" message appears above the Course Content button bar.

Figure 16: Publish Course
NOTE: Until you publish a course, the content that you have created is not accessible to students. Therefore, it is possible to have a course with published content which you are modifying in development. The content changes in development will not impact the published version of the course or be viewable by students until you select the Publish Course button.
As you add, remove, and reorder pages and objectives, the sidebar menu presenting the order of content within the course may become out of sync with the actual order of content. Therefore, use the Rebuild Sidebar button to synchronize the actual course content flow and the sidebar menu presented to students. Upon clicking Rebuild Sidebar the sidebar menu is automatically updated based upon the current order of course content. This may take several seconds based upon the size of the course.
NOTE: Although there is no visual clue that the sidebar has been altered, reviewing the course by selecting the View Course in Develop button will confirm that the sidebar menu and the course content are synchronized.
If you select either Print Course in Development or Print Course in Development w/Pretests & Exams, a new window opens with a printable version of your course content. The printable version is similar to an outline of the content and will provide a complete review of the actual content that a student would see across the multiple pages of the course.
The Prosperity Content Editor features WYSIWYG (What You See Is What You Get) similar to Microsoft FrontPage or even Microsoft Word. You can type or copy and paste text into the editor and create content just as you would if you were using a standard word processor. Almost all of the standard editing features are available to you as you create your content within the Prosperity Content Builder. You can cut, copy, and paste from other applications as well as insert pictures, movies, etc. created in other applications. Most of the features are accessible from buttons from the button bar.
The editor has four main parts:
1. At the top of the page, the Title and File Name of the page you are editing are listed.
2. Beneath the Title and File name is the button bar. This double-bar contains most of the standard formatting tools that you will need for creating your content.
3. The main portion of the page is the content entry area. This is the area in which you will enter your content.
4. The "Normal" and "HTML" tabs allow you to switch between viewing the content as it would appear to the end user (normal view) and viewing the source code (html view). If you are experienced with HTML, you can switch to the HTML view and make modifications and additions just as you would if you were working in a typical HTML editor. If you are not familiar with HTML, you may never need to look at this view
5. The buttons that allow you to submit or save your content changes and close the editor window.
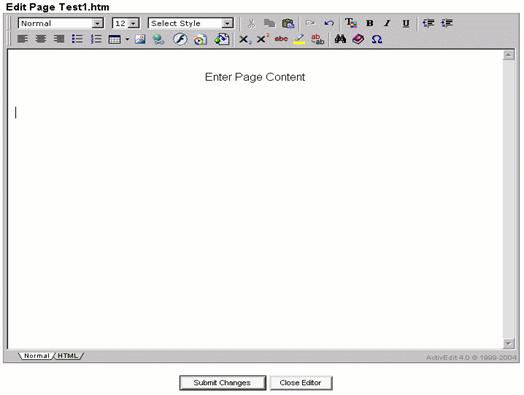
Figure 17: WYSIWYG Editor

Figure 18: WYSIWYG Formatting Buttons
The following provides a short synopsis of the function for each option on the button bar, from left to right.
§ HTML Styles - HTML has a set of pre-defined styles that you can apply to your text. Select the text you wish to modify and choose the style from this dropdown list.
§ Font Size - sets the size of the font for the selected text
§ Custom Styles - Along with the pre-defined styles, you can specify custom styles that you define in a stylesheet. These can also be applied to your text.
§ Cut - remove selected text and place it on the clipboard
§ Copy - copy selected text and place it on the clipboard
§ Paste - insert text from the clipboard into the location current location of the cursor
§ Redo - Re-apply the last modification made
§ Undo - Reverse or remove the last modification made
§ Font Color - choose the font color for the currently selected text
§ Bold - apply bold formatting to the currently selected text
§ Italicize - apply italics to the currently selected text
§ Underline - apply an underline to the currently selecting text
§ Remove Indent - remove a currently applied indent
§ Indent - apply a hanging indent
§ Left Align - the current paragraph will be left aligned.
§ Center Align - the current paragraph will be center aligned
§ Right Align - the current paragraph will be right aligned
§ Bullet List - start a bullet list. If you wish to end a bullet list, press the ENTER key twice
§ Numbered List - start a numbered list. If you wish to end a numbered list, press the ENTER key twice
§ Insert Table - Press this button to open the table creation window. This window lets you specify the number of columns and rows you wish to create along with the style of the table boarders. Press the Insert Table button to insert the table at the current position of the cursor.
§ Insert Image - Press this button to open the Insert Image window. This window allows you to insert an image that already exists on the server or upload a new image to the server.
o
To upload an image from
your local computer to the web server, press the New Image button. This
opens the add new image window. Select the Browse button to locate the
particular image you wish to upload, and then press the upload button.
o To insert the image at the current cursor position, press the Insert Image button.
§ Insert Link - create a hyperlink to another web page, web site, or document by pressing the Insert Link button. Select the text or image you wish to link and then press the Insert Hyperlink button. Enter the URL of the page you wish to link to and specify a target.
§ Insert Flash Movie - This button allows you to embed a previously created Flash movie into your content. It allows you to control the major properties of a Flash movie including width, height, alignment, and auto-play. You can either select a Flash movie that has been uploaded as a resource or specify a movie at a URL.
§ Embed Movie Clip - This button allows you to embed an object file like a WMV movie, Quicktime movie, or MP3 audio clip. The properties window allows you to control the width, height, and alignment of this object. You can either link to an object file that exists as a resource on the Prosperity server or specify the URL to an object at another location.
§ Insert Resource Link - Along with using the standard Insert Link button, you can use the custom Insert Resource Link button to link to documents that have been uploaded to the Prosperity Server through the use of the resources button.
§ Subscript - subscript the currently selected text
§ Superscript - superscript the currently selected text
§ Cross-Through - put a black line through the currently selected text
§ Highlight - create a yellow background highlight on the currently selected text
§ Remove Format - remove all formatting from the currently selected text
§ Find - Currently Disabled
§ Help - open the online help window
§ Special Characters - insert special characters on the page
 Course Content
Overview
Course Content
Overview