Setup Configuration Options for the Admin Portal
Admin Portal Configuration Overview
During project kickoff, clients are provided the Prosperity Portal Setup spreadsheet for completion. The responses from this survey are used to configure the Admin Portal, including what menu options admins (managers, instructors, etc…) see when they log in and the page layouts. You will need to work with your Project Consultant to review and setup these configurations.
Getting Started with Admin Portal Configuration
This guide shows you how to:
1. Set up global constants
2. Identify Menu options
3. Setup Welcome Page
4. Choose page templates and configurations for:
§ Student Profile
§ Company Profile
§ Current Courses
§ My Programs
§ Course Catalog
§ My Transcript
§ Document Library
Set Up Global Constants for Admin Portal
The responses recorded in the Prosperity Portal Setup spreadsheet are used by the project consultant to set up default values throughout the student portal. You will need to work with your Project Consultant to review and setup these configurations.
Examples of these include:
§ How students are entered into system: impacts how students enroll and register, as well as the fields that show on the Student Profile.
§ Training students can access: impacts decisions about the courses students see in the catalog.
§ How students sign up for training: impacts decisions on when students see the course catalog (before or after they enroll)
Set Up Welcome Page
When users log in to the Admin Portal, a welcome page can be defined with screen text. Additionally, the welcome page can be different based on the admin group to which users are assigned. Clients provide their project consultant with a Word document, PowerPoint file, or an HTML file containing the content for the welcome page.
Or, users can set this up themselves. There are two steps to define the Admin Welcome Page:
1. Define the Admin Group and assign users to this group (See the Prosperity Corporate Structure: Companies Training Guide)
2. Specify the Welcome Page message
3. Click Permissions from the Admin menu option.
Specify Welcome Page
You will need to work with your Project Consultant to review and setup these configurations.

Figure 1: Permissions Menu Option
4. Pick the group that should see the Welcome Page you are going to define by clicking Details.
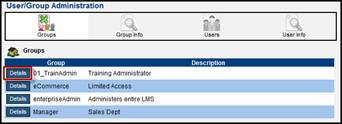
Figure 2: Select Group
5. Or, create a new group by clicking New Group.
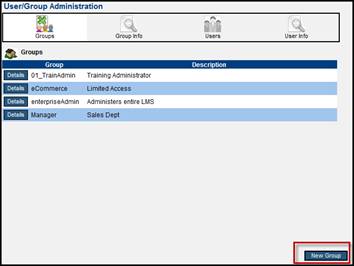
Figure 3: Create New Group
6. Type the Admin group name in the Group field.
7. Enter a description (optional).
8. Enter the message users will see when they log in to the Admin Portal.
9. Click Show All to display all users with Admin logins.
10. Click to check users in the admin group who can see the Welcome Page you’ve defined.
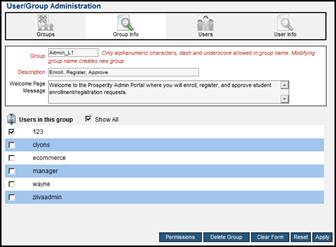
Figure 4: Admin Group and Welcome Page Setup
11. Click Apply.
When a user in the group for the defined Welcome Page logs in, they will see the specified welcome message.

Figure 5: Welcome Page Message
Define Menu Options
Configuration options also allow you to specify the admin portal menu options you want users within an admin group to be able to see. You will need to work with your Project Consultant to review and setup these configurations.
1. Click Permissions from the Admin menu option.
Figure 6: Permissions Menu Option
2. Click Details next to the group for which you are defining menu views.
Figure 7: Select Group
3. Click Show All to list all users within the specified group.
4. Click the checkbox next to the users for which you are defining menu views.
5. Click Permissions.
Figure 8: Users in Group
6. Click the checkboxes next to the access areas you want the specified users to be able to access.
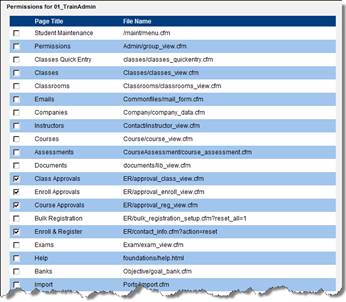
Figure 9: Select Permissions
7. Click Apply.
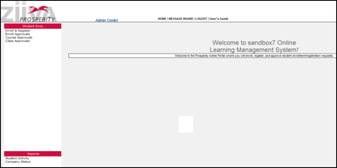
Figure 10: Specified Menu Views
Once logged in, users within the specified admin group only see the menu options you checked off.
Student Profile
Student profile information is displayed in both the Admin Portal and the Student Portal and is populated by three different methods, depending on your configuration. You will need to work with your Project Consultant to review and setup these configurations.
§ Bulk Registration: Importing the Registration History file.
§ Manual student enrolment and registration via the Admin Portal
§ Self registration by the student via the Student Portal
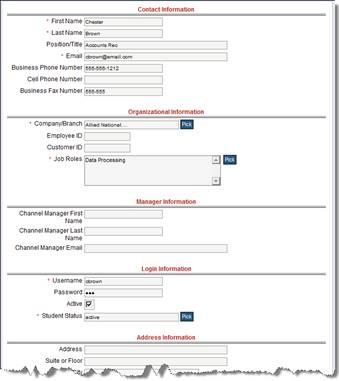
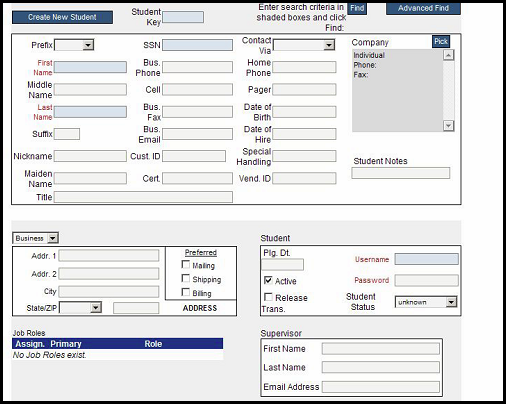
Figure 11: Student Profile in Admin Portal
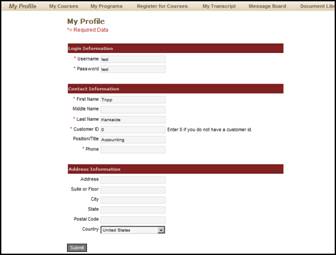
Figure 12: Student Profile in Student Portal
The data fields that display in the Student Profile form are configurable, in that you can identify the fields that should display. Configuring the Student Profile data fields involves specifying available fields you want to use.
While you cannot change the name of a field header, you can use a field for any alternate type of data. For example, you might consider using the Pager number field as the field to enter a license number. In this case, the Registration History Import file would retain the Pager Number field header, but the data would reflect a license number.
Configuring the Student Profile data fields is accomplished by completing the Profile Checklist in which you check off the fields to display, and submitting it to your project consultant.
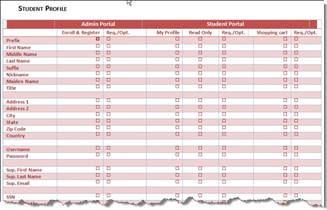
Figure 13: Student Profile Checklist
This form provides you with the field specifications for each data field, as shown below.
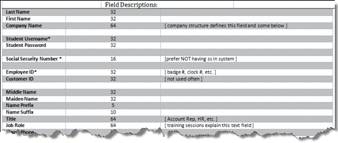
Figure 14: Student Profile Field Specifications
Student Transcripts and Training Maps
The following pages are samples of some of the Prosperity screens that can be configured to show LMS data in different presentations. You will need to work with your Project Consultant to review and setup these configurations.
There are Admin and Student Portal options to choose. The screens are:
§ Transcripts – The course history of a Student. Course Ids/Dates/Scores/etc.
§ Student Profiles – The Student’s personal information. Name(s)/Addresses/
§ Username/Password/Supervisor info/custom fields/etc.
§ Training Maps – A list of courses that the Student is signed up for, actively reading, or eligible to register for.
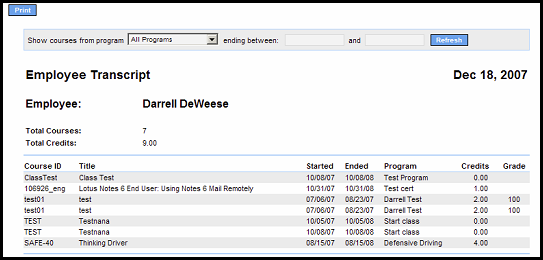
Student Transcript
This Transcript will show all the history of a student, group by program.
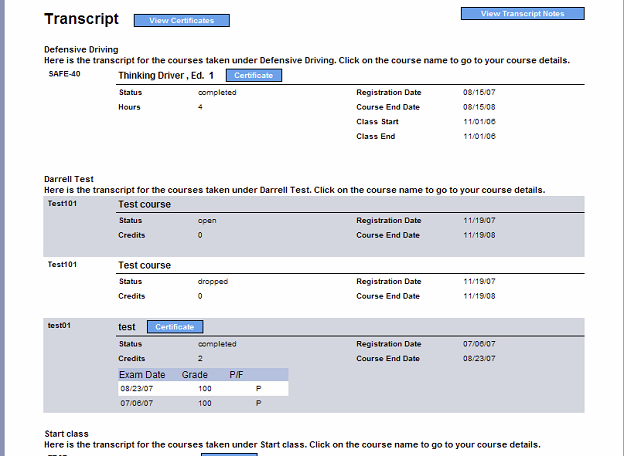
This is the most basic Transcript, which will show the status of the program and course, end date, registration date, and exam score.
This Transcript can show inactive programs, and can be sorted by status, name, date, etc.
This Transcript shows the courses in a row of columns, and the program is selected from a dropdown list. You can also filter by date.
Profile Pages
This Profile page is the basic, but is configurable.
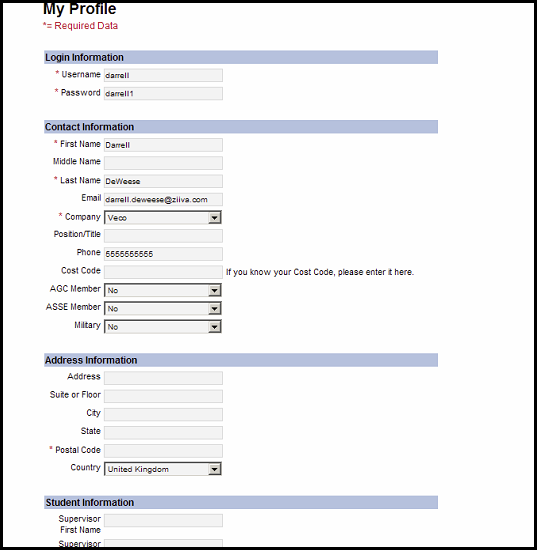
Any fields that you want can be added, for this one as well as the following one:
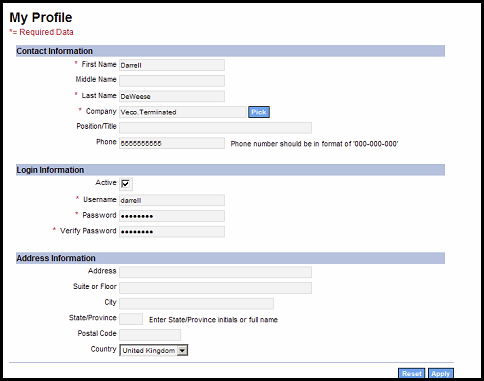
The admin portal can use this Profile:
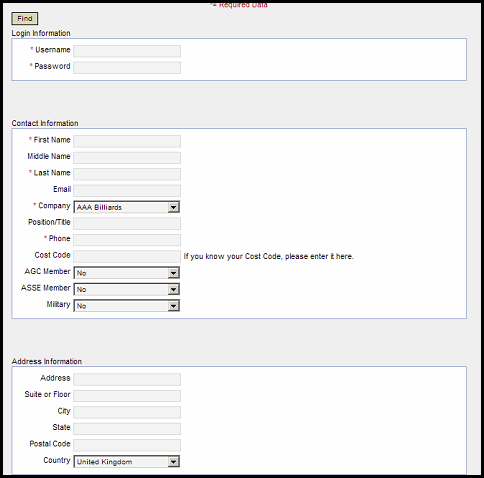
Or this Profile:
Training Maps
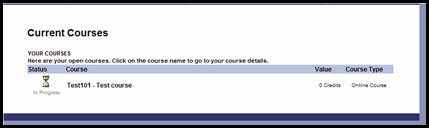
Here is the basic Training Map. It gives you a list of course that the student is registered for.
This is list of courses by Program:
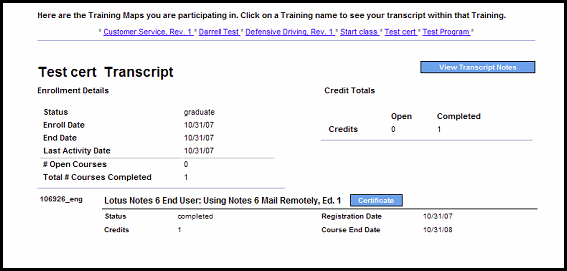
This is another example of a Training Map, with a list of programs and the courses.
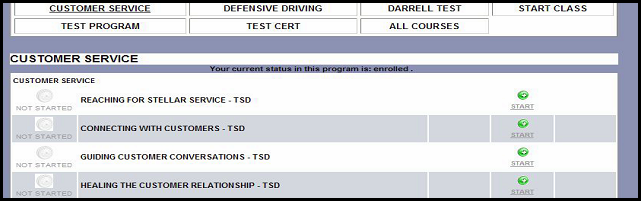
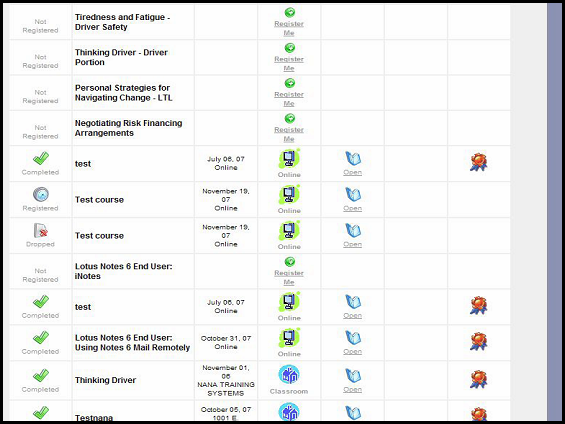
This Training Map shows the courses that the student is registered for and shows courses that the student is eligible to register for. It also has a certificate link for courses completed, as well as an icon that explains the type of course(classroom, online, etc), as well as location and time.
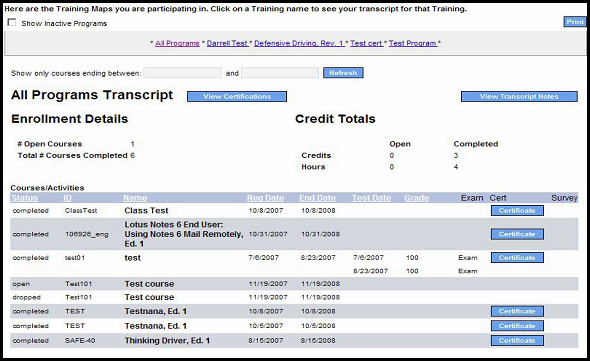
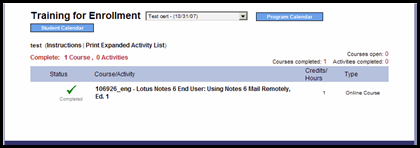
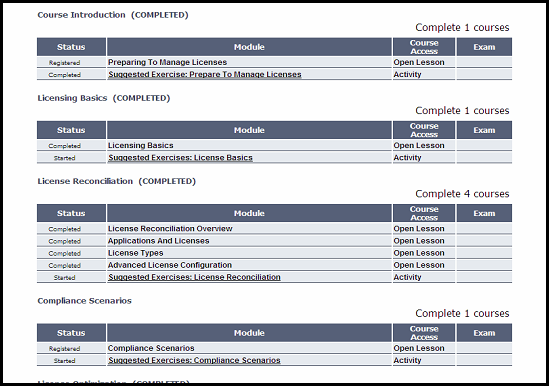
This training map shows all courses and activities within a given program, and allows the student to launch the course, exam, etc… directly from this screen without having to drill down. Details for the course can be displayed by clicking on the name of the course.
 Set Up Global Constants for
Admin Portal
Set Up Global Constants for
Admin Portal